Intel® RealSense™ ROS 2 Sample Application
This tutorial tells you how to:
Launch ROS nodes for a camera.
List ROS topics.
See that Intel® RealSense™ topics are publishing data.
Get data from the Intel® RealSense™ camera (data coming at FPS).
See an image from the Intel® RealSense™ camera displayed in rviz2.
Run the Intel® RealSense™ ROS 2 Sample Application
Connect an Intel® RealSense™ camera (for example, D435i) to the host.
To download and install the Intel® RealSense™ ROS 2 sample application run the command below:
sudo apt-get install ros-humble-realsense2-tutorial-demo

Set up your ROS 2 environment
source /opt/ros/humble/setup.bash
Launch Intel® RealSense™ viewer and check for any firmware updates.
To download and install the Intel® RealSense™ viewer run the command below:
sudo apt-get install librealsense2-dkms
sudo apt-get install librealsense2-udev-rules
sudo apt-get install librealsense2-utils
Open the Intel® RealSense™ viewer application:
sudo -E realsense-viewer
In the Intel® RealSense™ viewer, if any firmware update is available, a window popup appears in the upper right corner.
During the firmware update installation, do not disconnect the Intel® RealSense™ camera. Press Install in the window popup.
After the installation is complete or if no update is available, close the Intel® RealSense™ viewer.
Run the Intel® RealSense™ ROS 2 sample application:
/opt/ros/humble/share/realsense/tutorial-realsense/realsense-demo.sh
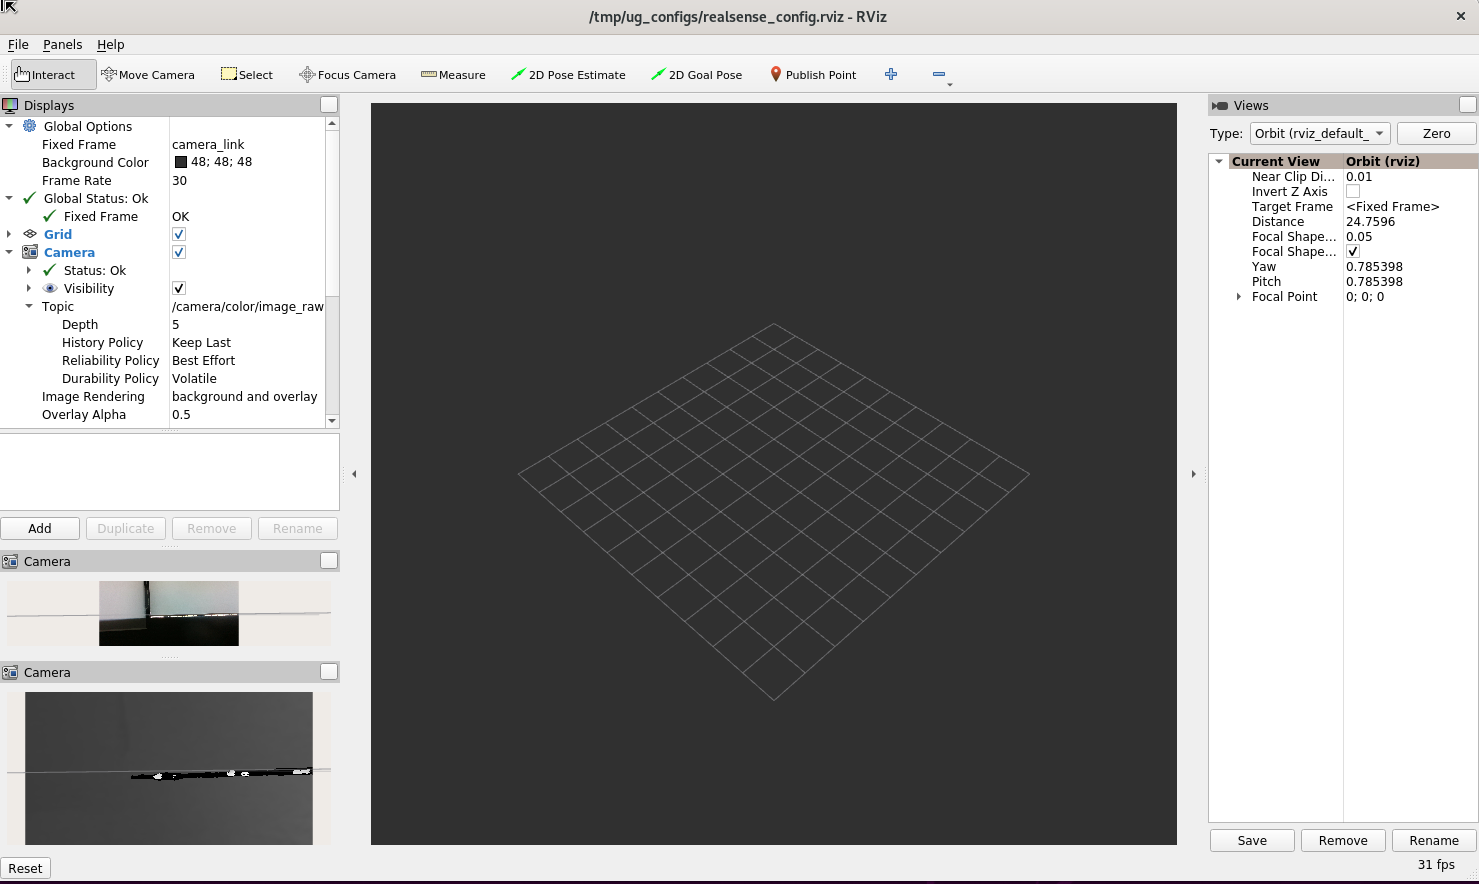
Expected output: The image from the Intel® RealSense™ camera is displayed in rviz2, on the bottom left side.
To close this, do the following:
Type
Ctrl-cin the terminal where you did the command for tutorial.