Tutorial to Use GPU ORB Extractor Feature with OpenCV-free Library.
This tutorial shows how to use the GPU orb-extractor feature OpenCV-free library. The GPU orb-extractor feature OpenCV free library provides similar features except input and output structures are defined within this library.
Prepare the environment
cd /opt/intel/orb_lze/samples/

main.cppshould be in the directory with following content:Note
Please refer to the main.cpp file which is already explained in the Tutorial to use a GPU orb-extractor feature Tutorial to Use GPU ORB Extractor Feature.
Build the code:
cp -r /opt/intel/orb_lze/samples/ ~/orb_lze_samples
cd ~/orb_lze_samples/
mkdir build
cd build
cmake -DBUILD_OPENCV_FREE=ON ../
make -j$(nproc)
Run the binary:
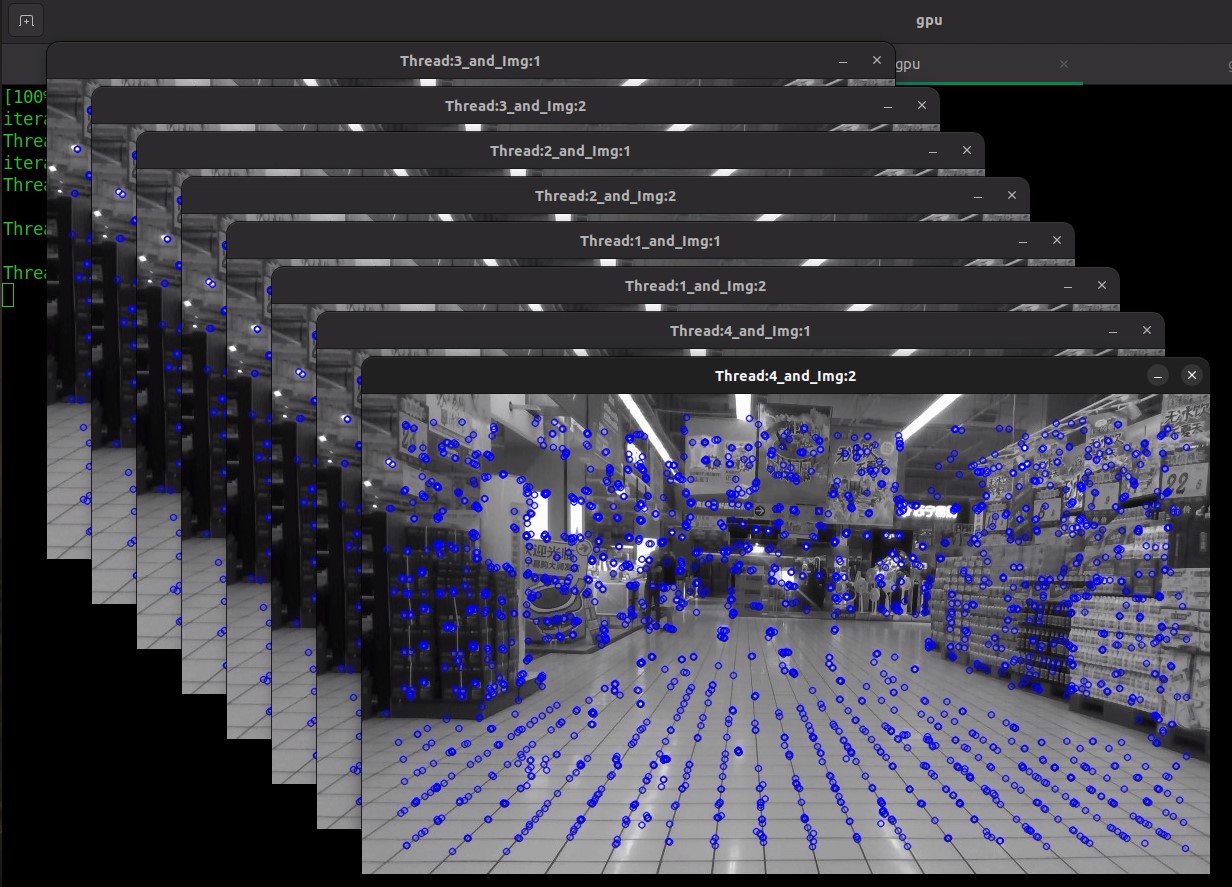
./feature_extract -h

Following are the command line arguments:

Usage: ./feature_extract --images=<> --image_path=<> --threads=<>

  --images <integer>     :  Number of images or number of cameras. Default value: 1
  --image_path <string>  :  Path to input image files. Default value: image.jpg
  --threads <integer>    :  Number of threads to run. Default value: 1
  --iterations <integer> :  Number of iterations to run. Default value: 10

The following command, it will run four threads, each thread is taking two cameras image input.

./feature_extract --images=2 --threads=4
After executing, the input image will display keypoints in blue color dots.
Expected results example:
./feature_extract --images=2 --threads=4
 iteration 10/10
 Thread:2: gpu host time=21.4233
 iteration 10/10
 Thread:1: gpu host time=21.133
 iteration 10/10
 Thread:4: gpu host time=20.9086
 iteration 10/10
 Thread:3: gpu host time=20.6155
After executing, the input image will display keypoints in blue color dots.
Note
Here, you can specify the number of images per thread and the number of threads to be executed. You have the option to process multiple image inputs within a single thread of the extract API or to process a single or more images input using multiple threads with extract API calls.
Code Explanation
Initialize the input and output parameters:
#ifdef OPENCV_FREE
    Mat2d *images = new Mat2d[num_of_cameras];
    std::vector<MatType> in_image_array;
    for( int i = 0; i < num_of_cameras; i++)
    {
        images[i] = Mat2d(all_images[i].rows, all_images[i].cols, all_images[i].data);
        in_image_array.push_back(images[i]);
    }
    std::vector<MatType> in_image_mask_array;
    std::vector<MatType> descriptor_array;
#else
In the above code, it shows how to store images in Mat2d class object.
Note
Based on BUILD_OPENCV_FREE=ON, only OpenCV-free dependency code will compile and link to the libgpu_orb_ocvfree.so library.
Orb-extractor feature libraries have their own defined classes for image input and keypoint output.
For more details, see the /usr/include/orb_type.h file.
This file is installed by the Deb package liborb-lze-dev.
The vector of keypts can be used by application, or convert to different type. This example show how to convert ORB extractor KeyPoint to cv::KeyPoint.
#ifdef OPENCV_FREE
    for(int i=0; i < num_of_cameras; i++)
    {
        auto& gpu_keypts = keypts.at(i);
        for (int pt=0; pt < gpu_keypts.size(); pt++)
        {
            all_keypts[i].emplace_back(cv::KeyPoint(gpu_keypts[pt].x, gpu_keypts[pt].y,
                        gpu_keypts[pt].size, gpu_keypts[pt].angle, gpu_keypts[pt].response,
                        gpu_keypts[pt].octave, -1));
        }
    }
#else