Install Intel® Robotics SDK Deb packages
This section details steps to install Robotics SDK Deb packages.
Note
Before proceeding, ensure that you have first prepared the target system.
Before using the Robotics SDK APT repositories, update the APT packages list:
sudo apt update

The APT package manager will download the latest list of packages available for all configured repositories.

Note
If the APT package manager is unable to connect to the repositories, follow these APT troubleshooting tips:
Make sure that the system has network connectivity.
Make sure that port 80 is not blocked by a firewall.
Configure an APT proxy (if network traffic routes through a proxy server).
To configure an APT proxy, add the following lines to a file at /etc/apt/apt.conf.d/proxy.conf (replace the placeholder as per your specific user and proxy server):
Acquire:http:Proxy "http://user:password@proxy.server:port/";
Acquire:https:Proxy "http://user:password@proxy.server:port/";
To ensure proper proxy settings for other tools required during the package installation add the the required proxy settings to /etc/environment:
http_proxy=http://user:password@proxy.server:port
https_proxy=http://user:password@proxy.server:port
no_proxy="localhost,127.0.0.1,127.0.0.0/8"
After setting the proxy values in /etc/apt/apt.conf.d/proxy.conf and /etc/environment you will have to reboot the device, so these settings become effective.
Choose the Robotics SDK Deb package to install.
- ros-humble-robotics-sdk
The standard version of the Robotics SDK. This package includes almost everything except for a handful of tutorials and bag files.
- ros-humble-robotics-sdk-complete
The complete version of the Robotics SDK. It also includes those items excluded from the standard version. Please note that the complete SDK downloads approximately 20GB of additional files.
Install the chosen Robotics SDK Deb package
Note
Before you install ros-humble-robotics-sdk-complete (or any other packages that depend on OpenVINO), please read the information on Installing OpenVINO™ packages.
Install command example:
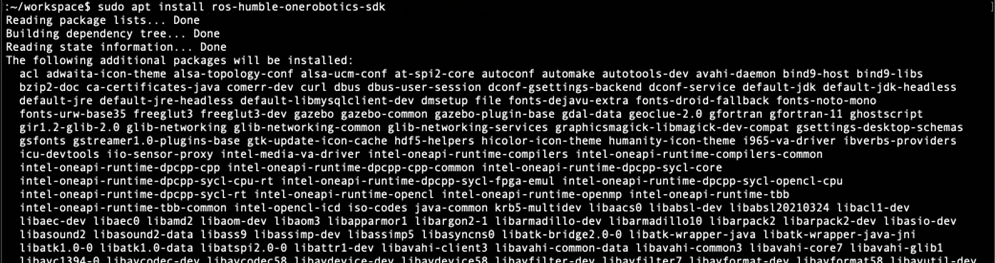
sudo apt install ros-humble-robotics-sdk
The standard version of the Robotics SDK should generally download and install all files within just a few minutes. The complete version of the Robotics SDK will take several more minutes and consume significantly more network bandwidth.
The actual installation time will vary greatly based primarily upon the number of packages that need to be installed and the network connection speed.
Before using the Robotics SDK APT repositories, update the APT packages list:
sudo apt update
The APT package manager will download the latest list of packages available for all configured repositories.
Note
If the APT package manager is unable to connect to the repositories, follow these APT troubleshooting tips:
Make sure that the system has network connectivity.
Make sure that port 80 is not blocked by a firewall.
Configure an APT proxy (if network traffic routes through a proxy server).
To configure an APT proxy, add the following lines to a file at /etc/apt/apt.conf.d/proxy.conf (replace the placeholder as per your specific user and proxy server):
Acquire:http:Proxy "http://user:password@proxy.server:port/";
Acquire:https:Proxy "http://user:password@proxy.server:port/";
To ensure proper proxy settings for other tools required during the package installation add the the required proxy settings to /etc/environment:
http_proxy=http://user:password@proxy.server:port
https_proxy=http://user:password@proxy.server:port
no_proxy="localhost,127.0.0.1,127.0.0.0/8"
After setting the proxy values in /etc/apt/apt.conf.d/proxy.conf and /etc/environment you will have to reboot the device, so these settings become effective.
Choose the Robotics SDK Deb package to install.
- ros-humble-aaeon-adbscan-tutorial
AAEON Robot ADBSCAN mapping with FastMapping algorithm using Intel® RealSense™ camera.
- ros-humble-aaeon-ros2-amr-interface
Lightweight package to get AMRs working with ROS 2.
- ros-humble-adbscan-ros2
Adaptive Density-based Spatial Clustering of Applications with Noise (ADBSCAN) for ROS 2.
- ros-humble-adbscan-ros2-follow-me
Enable a robot to follow a specific person or target based on Adaptive DBScan clustering and gesture based motion control.
- ros-humble-collab-slam-avx2
Collaborative SLAM for AVX2 CPU instruction accelerated package on supported Intel Core processors
- ros-humble-collab-slam-lze
Collaborative SLAM for GPU Level-Zero accelerated package on supported Intel processors with integrated graphics
- ros-humble-collab-slam-sse
Collaborative SLAM for SSE-only CPU instruction accelerated package on supported Intel Atom processors
- ros-humble-cslam-tutorial-all
Collaborative SLAM all tutorials.
- ros-humble-fast-mapping
Allen Fast Mapping, a ROS 2 package for real-time scene modeling from sequential depth images from prerecorded ROS 2 bag.
- ros-humble-follow-me-tutorial
Follow-Me application with ADBSCAN using Intel® RealSense™ camera.
- ros-humble-followme-turtlebot3-gazebo
An adaptation of TurtleBot3 simulation by Intel to include a multi robot environment to demo the follow me algorithm.
- ros-humble-its-planner
Intelligent Sampling and Two-Way Search.
- ros-humble-its-relocalization-bringup
Re-localization bring up package.
- ros-humble-kdvisual-ros2
Kudan Visual SLAM ROS 2 node.
- ros-humble-kdvisual-tutorial-aaeon-realsense
Tutorial for Kudan Visual SLAM using an Aaeon robot with an Intel® RealSense™ camera.
- ros-humble-kdvisual-tutorial-prerecorded
Tutorials for Kudan Visual SLAM using prerecorded ROS 2 bags.
- ros-humble-picknplace-simulation
Meta Package for pick n place simulation deb files.
- ros-humble-realsense2-tutorial-demo
Intel® RealSense™ tutorial with sample application.
- ros-humble-wandering
Wandering application.
- ros-humble-wandering-tutorials
Meta-package for Intel® Wandering application tutorials.
Install the chosen Robotics SDK Deb package.
Note
Before you install ros-humble-robotics-sdk-complete (or any other packages that depend on OpenVINO), please read the information on Installing OpenVINO™ packages.
Install command example:
sudo apt install <package-name>
To run Intel® Robotics SDK in a Docker container you must have Docker installed on your system. You can go with an existing installation or start with a fresh install.
Install Docker
Follow the Install Docker Engine on Ubuntu guide, to install Docker on your target system.
After uninstalling any old Docker versions you have the option to:
Now you are ready to setup a Dockerfile that you can use to create your own Intel® Robotics SDK Docker image.
Follow the Dockerfile reference to learn how to create and launch your Docker image.
Example of installing the Robotics SDK inside a Docker container
Note
The following example is provided as a reference only.Modify for your specific needs and environment, include for instance any proxy settings that may be necessary.
Sample Dockerfile
The Dockerfile defines the content of your Docker image.
# Create image from ROS2 Humble base
FROM ros:humble-ros-base-jammy

ENV DEBIAN_FRONTEND=noninteractive

# Install bootstrap packages
RUN apt-get update \
   && apt-get install --no-install-recommends -y git apt-utils wget \
   && rm -rf /var/lib/apt/lists/*

# Add APT gpg key
RUN bash -c 'wget -q -O- https://eci.intel.com/repos/gpg-keys/GPG-PUB-KEY-INTEL-ECI.gpg | tee /usr/share/keyrings/eci-archive-keyring.gpg > /dev/null'

# Add ECI APT repo
RUN bash -c 'echo "deb [signed-by=/usr/share/keyrings/eci-archive-keyring.gpg] https://eci.intel.com/repos/$(lsb_release -sc) isar main" | tee /etc/apt/sources.list.d/eci.list'
RUN bash -c 'echo "deb-src [signed-by=/usr/share/keyrings/eci-archive-keyring.gpg] https://eci.intel.com/repos/$(lsb_release -sc) isar main" | tee -a /etc/apt/sources.list.d/eci.list'
RUN bash -c 'echo -e "Package: *\nPin: origin eci.intel.com\nPin-Priority: 1000" | tee /etc/apt/preferences.d/isar'

# Add AMR APT repo
RUN bash -c 'echo "deb [trusted=yes] https://amrdocs.intel.com/repos/$(lsb_release -sc) amr main" | tee /etc/apt/sources.list.d/amr.list'
RUN bash -c 'echo "deb-src [trusted=yes] https://amrdocs.intel.com/repos/$(lsb_release -sc) amr main" | tee -a /etc/apt/sources.list.d/amr.list'
RUN bash -c 'echo -e "Package: *\nPin: origin amrdocs.intel.com\nPin-Priority: 1001" | tee /etc/apt/preferences.d/isar'

# Add oneAPI APT repo
RUN bash -c 'wget -q -O- https://apt.repos.intel.com/intel-gpg-keys/GPG-PUB-KEY-INTEL-SW-PRODUCTS.PUB | gpg --dearmor | tee /usr/share/keyrings/oneapi-archive-keyring.gpg'
RUN bash -c 'echo "deb [signed-by=/usr/share/keyrings/oneapi-archive-keyring.gpg] https://apt.repos.intel.com/oneapi all main" | tee /etc/apt/sources.list.d/oneAPI.list'
RUN bash -c 'echo -e "Package: intel-oneapi-runtime-*\nPin: version 2023.2.0-*\nPin-Priority: 1001" > /etc/apt/preferences.d/oneAPI'

# Add RealSense APT repo
RUN bash -c 'mkdir -p /root/.gnupg'
RUN bash -c 'gpg --no-default-keyring --keyring /usr/share/keyrings/realsense-archive-keyring.gpg --keyserver hkp://keyserver.ubuntu.com:80 --recv-keys F6E65AC044F831AC80A06380C8B3A55A6F3EFCDE'
RUN bash -c 'echo "deb [signed-by=/usr/share/keyrings/realsense-archive-keyring.gpg] https://librealsense.intel.com/Debian/apt-repo $(lsb_release -sc) main" | tee /etc/apt/sources.list.d/realsense2.list'

# Add OpenVINO APT repo
RUN bash -c 'wget -O- https://apt.repos.intel.com/intel-gpg-keys/GPG-PUB-KEY-INTEL-SW-PRODUCTS.PUB | gpg --dearmor | sudo tee /usr/share/keyrings/openvino-archive-keyring.gpg'
RUN bash -c 'echo "deb [signed-by=/usr/share/keyrings/openvino-archive-keyring.gpg] https://apt.repos.intel.com/openvino/2023 ubuntu22 main" | sudo tee /etc/apt/sources.list.d/intel-openvino-2023.list'

# Ignore flann version 1.19
RUN bash -c 'echo -e "\nPackage: libflann*\nPin: version 1.19.*\nPin-Priority: -1\n\nPackage: flann*\nPin: version 1.19.*\nPin-Priority: -1" >> /etc/apt/preferences.d/isar'

# Populate debconf database with GPU selection for liborb-lze to eliminate the need for prompt
ARG GPU_GEN=gen12lp
RUN echo "liborb-lze liborb-lze/march select ${GPU_GEN}" | debconf-set-selections
RUN echo "liborb-lze:amd64 liborb-lze/march select ${GPU_GEN}" | debconf-set-selections

# Install robotics-sdk package
RUN apt-get update \
   && apt-get install -y ros-humble-robotics-sdk \
   && rm -rf /var/lib/apt/lists/*

# Add render group as necessary
ARG RENDER_ID=109
RUN if [ $(getent group render) ] ; then echo 'exists' ; else groupadd --gid ${RENDER_ID} render ; fi

# Config environ
ARG DOCKER_USER=amr
ARG DOCKER_USER_UID=1000
ARG DOCKER_USER_GROUPS=sudo,video,audio,plugdev,dialout,render

ENV DOCKER_USER         ${DOCKER_USER}
ENV DOCKER_USER_UID     ${DOCKER_USER_UID}
ENV HOME_DOCKER_USER    /home/${DOCKER_USER}
ENV WORKSPACE_DIR       ${HOME_DOCKER_USER}/workspace

# Create User
SHELL ["/bin/bash", "-xo", "pipefail", "-c"]
USER root
RUN useradd --create-home --shell /bin/bash --gid root --uid ${DOCKER_USER_UID} --groups ${DOCKER_USER_GROUPS} ${DOCKER_USER} \
   && passwd -d root \
   && passwd -d ${DOCKER_USER} \
   && echo "${DOCKER_USER} ALL=(ALL) NOPASSWD:ALL" | tee /etc/sudoers.d/${DOCKER_USER} \
   && echo 'export DISPLAY=":1"' >> /home/${DOCKER_USER}/.bashrc \
   && echo 'source /opt/ros/humble/setup.bash' >> /home/${DOCKER_USER}/.bashrc

# Create workspace folder
RUN mkdir -p ${WORKSPACE_DIR} && chown ${DOCKER_USER}:${DOCKER_USER_UID} ${WORKSPACE_DIR}
WORKDIR ${WORKSPACE_DIR}

USER ${DOCKER_USER}

CMD ["/bin/bash"]
Sample create script
Run the create script to create your Docker image based on the Dockerfile.
#!/bin/bash
cd "$( dirname "$0" )"

sudo apt install -y intel-gpu-tools debconf-utils

echo -e ""
sudo intel_gpu_top -L

echo -e "\nSelect the Intel integrated GPU present on this system. Suggested value is shown in the output above."
echo "  1. gen9  2. gen11  3. gen12lp"

while :; do
   read -p "Select GPU Generation (1, 2, or 3): " NBR
   [[ $NBR =~ ^[0-9]+$ ]] || { continue; }
   if ((NBR >= 1 && NBR <= 3)); then
      if [ $NBR = "1" ]; then
            GPU_GEN=gen9
      fi
      if [ $NBR = "2" ]; then
            GPU_GEN=gen11
      fi
      if [ $NBR = "3" ]; then
            GPU_GEN=gen12lp
      fi
      break
   fi
done

docker rmi robotics-sdk:2.0 2>/dev/null
docker build --no-cache --build-arg="GPU_GEN=$GPU_GEN" --build-arg="RENDER_ID=$(getent group render | cut -d: -f3)" -f Dockerfile -t robotics-sdk:2.0 .
Sample launch script
Launches the Docker image in Docker container.
#!/bin/bash
cd "$( dirname "$0" )"

docker run -it --rm -v /dev:/dev:ro --name robotics-sdk --network=host --privileged robotics-sdk:2.0